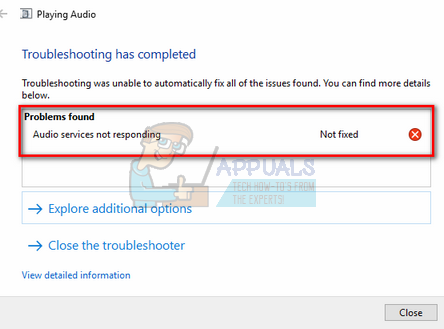
This is a very common error and usually occurs when you upgrade your version of windows using Windows Update. There are a few workarounds which include making sure that all the audio services are running as expected and the drivers are updated to the latest build. If all the solutions don’t work, we have to resort to a system restore.
Solution 1: Restarting Audio Services
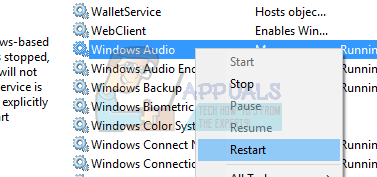
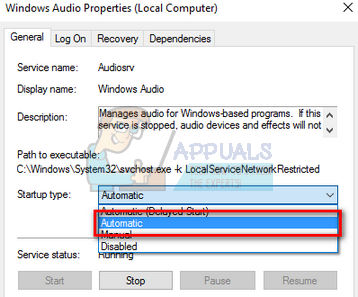
Before we resort to more complex and extensive solutions, we will try restarting the audio service. Alongside your sound hardware and drivers, there is an audio service present which is responsible for managing the audio on your computer. A simple restart might reboot its configurations and solve the issue at hand.
Solution 2: Checking Audio Components
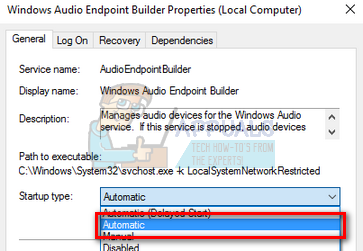
Before moving on to more technical workarounds, we will make sure that all the audio components are running. If any of them isn’t, it may be the cause why you are getting the error message. Also temporarily disable your antivirus as they sometimes block some services due to which you face difficulties. These are services and exclusion of any of them can cause discrepancies. RPC Endpoint Mapper Remote Procedure Call (RPC) DCOM Server Process Launcher
Solution 3: Executing some Command Prompt Instructions
If both the above solutions don’t make any difference or the checks were already correct on your machine, we can try executing some elevated command prompt instructions on your command prompt. Do note that you will need an administrator account to carry out this operation.
Solution 4: Installing Default Sound Drivers
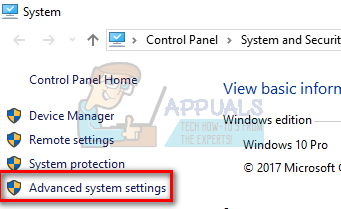
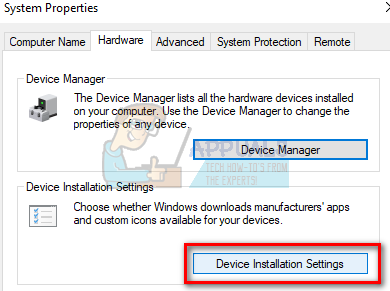
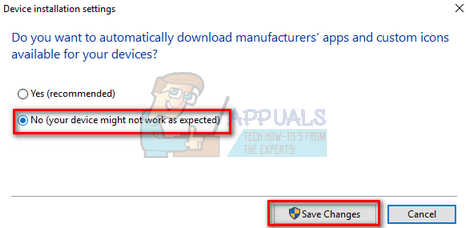
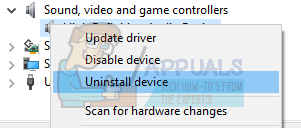
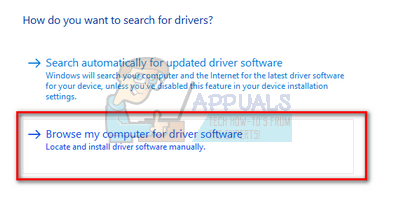
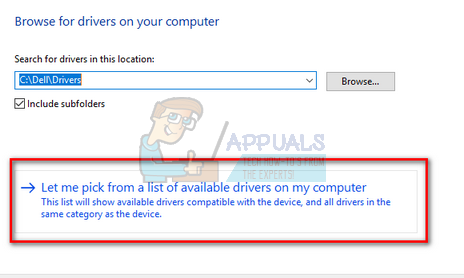
As your operating system keeps upgrading over time, the sound drivers are also included in most of the package and they also get updated periodically. Your computer has basic default driver already saved so whenever you uninstall your current drivers, your computer recognizes the hardware connected and installs the driver accordingly. We can try installing the default drivers on your system.
Note: If this solution doesn’t work, make sure to change the option back to “Yes”.
Solution 5: Installing Realtek or High Definition Audio Device
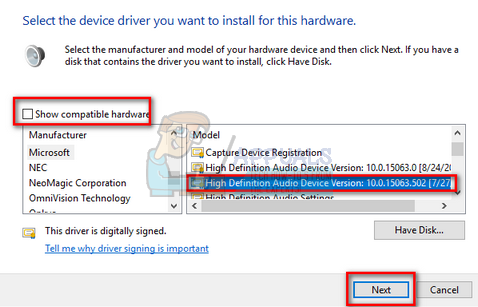
Many users reported that installing High Definition Audio Device driver instead of IDT High Definition Audio CODEC etc. solved the problem for them. We can try this last solution before we resort to a system restore or doing a clean installation.
Note: If this doesn’t work, try downloading the drivers from your manufacturer’s website and install them using the method listed above. In most cases, this also solved the problem.
Solution 6: Restoring from last Restore Point/ Doing a Clean Install
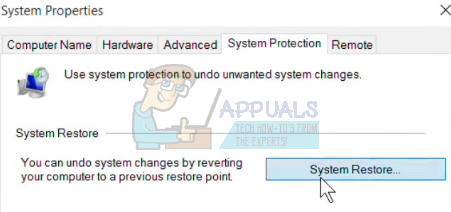
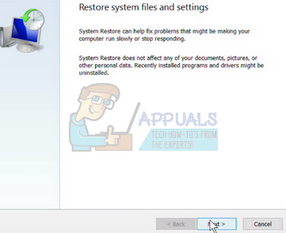
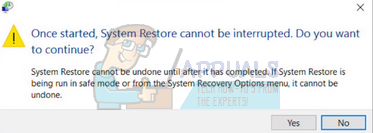
If all the above methods don’t work, we are left with no choice but to restore Windows to the last restore point. If you don’t have a restore point, you can install a clean version of Windows. You can use the utility “Belarc” to get all your licenses saved, backup your data using external storage and then perform a clean install. Here is the method on how to restore Windows from the last restore point.
If you don’t have any restore points, you can do a clean install of Windows using bootable media. You check our article on how to create a bootable media. There are two ways: by using media creation tool by Microsoft and by using Rufus.
Fix: Realtek Audio Manager won’t Open or Cannot find Realtek Audio ManagerHow to determine true audio quality of streaming audioFix: Thunderbird not Responding on WindowsFix: Start Menu Not Responding After Latest Update on Windows 10/11
