There are a few things that can cause this issue. It can be the automatically restarting feature that might be misbehaving or it might be restarting your system without giving you enough time to look at the error message. It can also be caused by overheating or a faulty power supply. A faulty RAM is can also be the culprit behind this issue. In short, mostly it’s a hardware problem related to your RAM or PSU or GPU (especially if it is an overheating issue). The rare cause of this includes driver problems as well. There are a few things that you can check which are given below in the methods. So, go through each method until the problem is solved.
Method 1: Turn off Automatic Restart Feature
The first thing that you should do is to turn off the automatic restart feature. This should be done to narrow down the causes of the error. Disabling this feature will help us check whether the restart was because of an error or not. This is mainly because most of the time the automatic restart feature will restart your PC without even showing the error message. So, if the problem is caused by a specific error then it should be shown on the screen after turning this feature off.
Now, use your system as you would on a regular basis and check whether the restart occurs or not. If the restart happens and you see an error message then look for the solutions of that error. Otherwise, continue to the next method.
Method 2: Check RAM for issues
The first thing you should do is check the RAM. A faulty RAM can also cause the issue which is easily traceable. You can check the RAM with the MemTest86 or you can do it manually by putting one RAM stick at a time to check which one causes the restart. You can also try to perform a benchmark test to see if the RAM is lagging behind. Checking the RAM with the MemTest86 is a time-consuming task. So, we will advise you to go for manual checking.
MemTest86
MemTest86 is a program that will check your RAM for any issues. This program is quite reliable but takes a lot of time. If you see a red result then that means the RAM is faulty. Take it out and then check your PC for any restarting issue.
Manual Checking
The manual way is the easy way but requires you to open the casing of your system. Follow the instructions below Confirm the issue by following the steps given above. If you see no progress by changing the RAM sticks then move to the next method. On the other hand, if there is no restart issue after taking out the faulty RAM then you are good to go. Note: Not only RAM, but the PSU can also cause similar issues with your computer therefore, you might also need to test it out.
Method 3: Check your PC for overheating
You should also check your system for overheating issues. Your system will restart automatically if it overheats while running a certain program. So, if you notice your system getting restarted on a specific program or generally when you run a resource-intensive program then overheating is the most likely cause. You can check the overheating issue in two ways: You can use third-party software to measure the temperature or you can use the built-in hardware monitoring sensors of your system.
CPUID
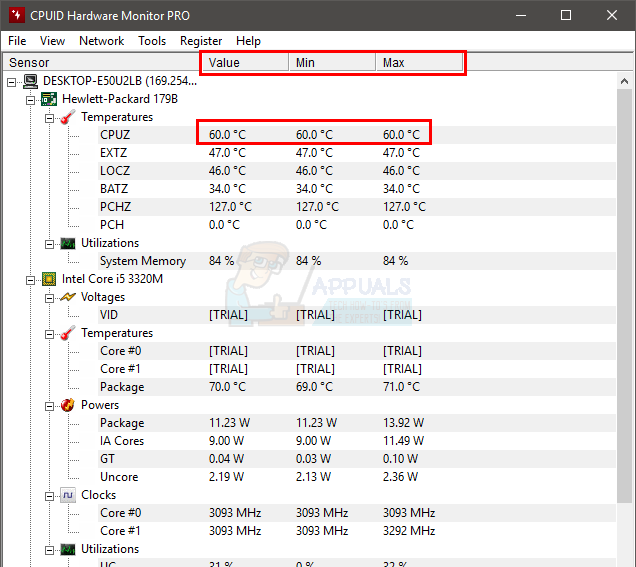
CPUID is a software that lets you measure your computer temperatures. You can use this to measure the temperature while playing a game and check whether the temperatures are in range or not. You can run the program and leave it in the background. Now, play a game or run any other resource-intensive program. Check the temperature values and voltages after a few minutes.
BIOS
As mentioned earlier, you can also use your BIOS to check the readings and voltages of your system. The majority of the systems have built-in sensors. Follow the steps given below to check the sensors of your system Check whether or not the readings are within the limits. The limits will be given on the CPUID software but if you aren’t sure then you can Google it for your specific device. If the readings aren’t in the range then that means it’s an overheating issue. You can confirm the overheating issue by putting hands on GPU or CPU once the system automatically restarts. If the CPU or GPU is very hot then that confirms the issue.
Resolving Overheating Issues
There are a couple of ways of solving the overheating issue.
Method 4: Check and replace the Power Supply
Lastly, you need to check the power supply unit for any issues. Your power supply is responsible for providing the power to all the components. Follow the steps given below to check the power supply for dust/dirt. You can also replace the power supply with another one (that is in working condition) and check if the restarting issue is solved or not. It will confirm the issue as well. If replacing the power supply solves the problem then you should get a new power supply.
Method 5: BIOS Update
Although unlikely but not entirely impossible, the problem might be caused by an outdated BIOS as well. If you have your computer for a very long time and you haven’t updated your BIOS then checking for an update is worth a shot. You can go to your manufacturer’s website and check for any updated BIOS version. Note: Updating BIOS is a highly advanced procedure and it can have irreversible effects. If you aren’t sure or you aren’t comfortable doing it on your own then take your computer to a specialist.
Method 6: Reinstalling Drivers
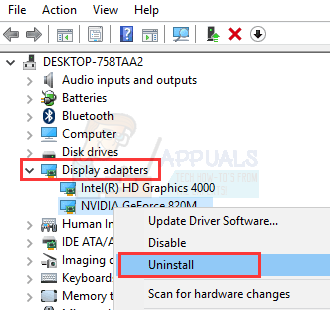
Sometimes, the issue might be caused by incompatible or outdated drivers especially if the issue started happening after an update or upgrade. Your graphics card driver is the most likely cause of random restarts. So, uninstall the graphics card driver and let the Windows download the most compatible drivers for it.
Reboot your system once the uninstall is finished. Windows will automatically install the latest and most compatible driver for your graphics card upon the next sign in. Check if you are having any issues after the restart.
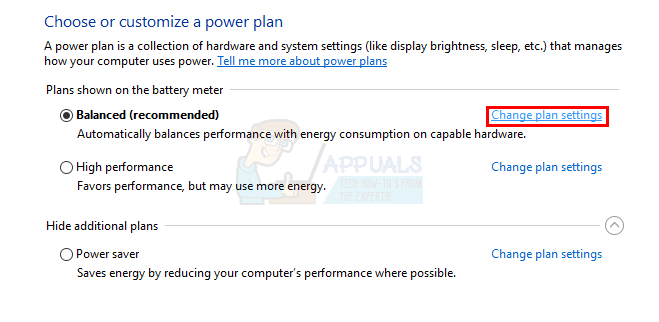
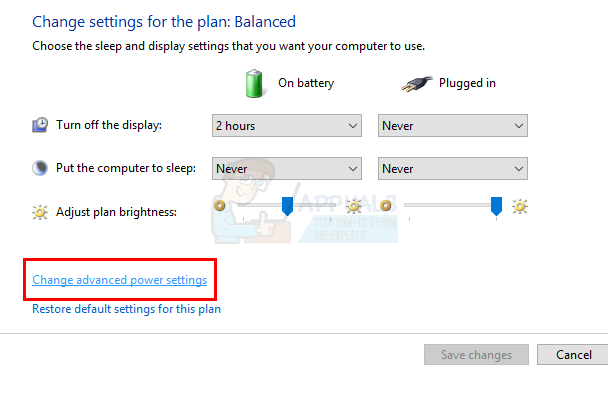
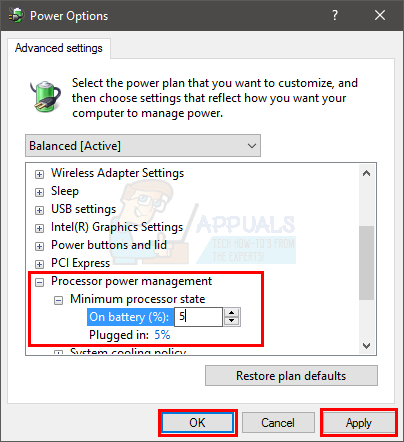
Method 7: Changing Power Options
This solution seems to resolve the random restarting issue. Basically, you will lower the minimum processor state to almost 5% which will prevent your system to randomly start.
Now, use your system or run a program to check if the issue is still there or not.
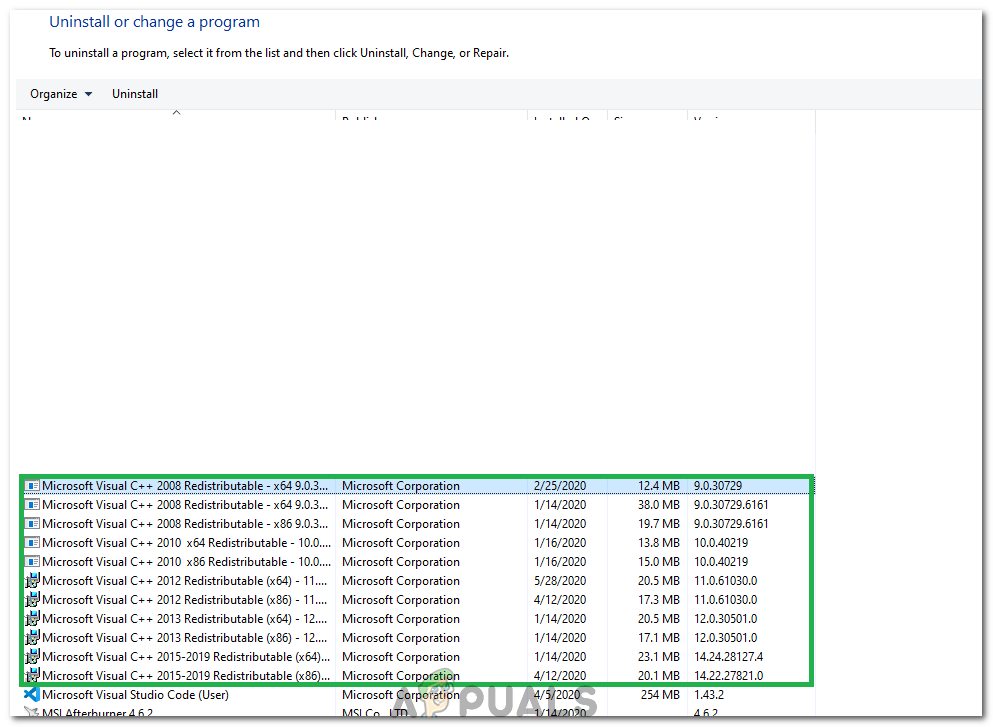
Method 8: Manually Reinstalling VCRedist
According to some users, a simple reinstall of the VC Redist software fixed their problem at least temporarily. Therefore, you can try your luck at reinstalling VC Redist and check if that fixes this issue for you. In order to do so:
FIX: Windows 10 Restarts Instead of Shutting DownFix: WiFi Network Force Restarts When Google Pixel 2 Is ConnectedUbisoft Addresses Division 2 Beta Issues, Recommends Restarts “Every Two To…How to Fix ‘Mouse Randomly Disconnecting and Reconnecting’ on Windows 10