The workarounds for this issue are quite simple and are listed below. However, if they do not work for you, consider performing a fresh install of the Windows operating system on your system or upgrade your system’s specifications. If you are using a virtual machine, make sure it is updated to the latest build available and your computer has enough capacity to handle it.
What causes HAL_INITIALIZATION_FAILED in Windows 10?
As mentioned earlier, this issue can be because of hardware problems, but in the majority of the cases, the problem corresponds to software components in your computer. Here are some of the most popular causes which came across during our investigation: Before we start with the solutions, there are some steps which you can perform to make the troubleshooting process simpler and easier. Here are some of them: When this error occurs, some users can boot in the system, and some users cannot boot in the system. Now if you cannot boot normally in the system then troubleshooting OS is not possible for a common user, in that case, you should boot the system into safe mode with networking, which is now a part of Automatic Repair Mode.
Solution 1: Setting ‘useplatformclock’ to True
This workaround is marked the ‘best’ for this BSOD when the computer randomly crashes after being brought back from sleep mode. According to online documentation, the command we are about to execute is related to High Precision Event Timer which is a hardware timer present on our computers. Let’s take a look.
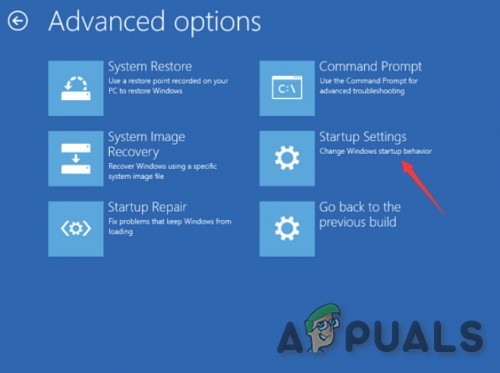
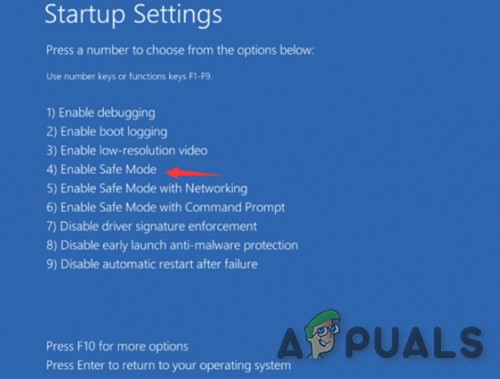
Solution 2: Try Windows Automatic Repair & Enable Safe Mode
In Safe Mode, the system starts with a minimum set of drivers, software & services. Usually, when the OS does not start normally, Safe Mode can start without any problem. It will help troubleshoot the system and diagnose which modules are causing the problems. To use Safe Mode in Windows 10, try to get into “Automatic Repair Mode” when it gets fail to boot three times. When Windows doesn’t boot properly, this screen pops up & Windows attempts to fix the problem by itself. To turn on the “Automatic repair mode”, you have to press the reset button to perform a Hard Shut Down after viewing the windows logo and repeating it three times which will enable the Automatic Repair Mode. On the 3rd start, you will be taken into the Automatic repair mode and then to the Recovery Environment where you can access Safe Mode, System Repair, Command Prompt etc. Now, as you are in safe mode, backup your essential data to someplace safe. Also, create a restore point. For detail instructions of creating the restore point, visit the following link on how to create a system restore point. Keep in mind that if you cannot access the installed OS, then you should use installation media to perform the above steps. Remember that you will need BitLocker Key if you’ve encrypted your device to start in safe mode. After creating the restore point and backing up your important data, move to the next solutions.
Solution 3: Cleaning Junk files
Junk files are usually old configurations of the system which get accumulated when they are used up or not needed anymore. This also includes old cookies etc. from web browsers. If you are using Microsoft store, it might also deposit junk files with time. Even though the system does not use junk files, there might be instances where they conflict with the existing settings of applications or the OS itself. It is always recommended to clean junk files from PC now and then. You can use the built-in Disk cleaner to clean up your system junk files. This cleaning can solve the problem of HAL Initialized Failed.
Solution 4: Run the SFC Command
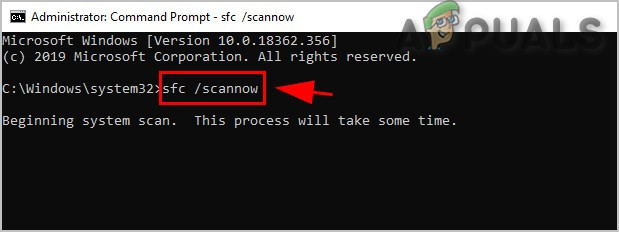
The missing/corrupted/damaged system files can cause the HAL Initialization Failed error. There is a built-in System File Checker (SFC) that can check and repair any problematic files automatically. This mechanism compares your existing installation files with an online manifest and see’s if anything is missing. If there is, it replaces it with a fresh copy so make sure you have a strong internet connection as well. We will use the SFC tool to fix missing or corrupt system files (if any). If you cannot boot into your system normally, execute the following command after accessing the command prompt after opening command prompt when in the recovery environment. and press Enter. If the problem persists, proceed to the next solution.
Solution 5: Run DISM Command
Deployment Image Servicing and Management is a tool that is used to scan and resolve issues of corrupted system files as well, and thus DISM can fix the HAL Initialization Failed Error if anything was missed by SFC scan. We usually recommend users to run the DISM command after they are done with the SFC scan. Here’s how to run DISM in Windows: After the execution of the DISM command, reboot system normally and see if the problem is solved. If not, move to the next solution. Note: If you cannot log into the OS, use the command prompt in the recovery environment of Windows.
Solution 6: Checking for Disk Corruption
A broken or corrupt hard drive is alarming. And the first warning messages by the system come in the form of BSOD errors. CHKDSK is a built-in Windows tool that verifies the file system integrity of a volume and fixes logical file system errors. The CHKDSK mechanism checks all the sectors of your disk and see’s if there is any corruption in any slice/sector. If there is, it tries to fix it by resetting. If it doesn’t get fixed, the sector will be blacklisted by the system and will not be used in the future. Here’s how to do it: Note: As with the previous solutions, if you are not able to access the operating system, you should use the command prompt in the recovery environment and execute the following commands.
Solution 7: Update the Virtual Machine (if any)
Virtual Machine Applications are known to create specific problems with their host environments. They are updated on a regular bases to patch any loopholes in the system. So, updating Virtual Machine to the latest version may solve the problem. Keep in mind that the steps in updating your VM might be slightly different than the undermentioned depending upon your VM machine.
Solution 8: Update Windows to the Latest Build
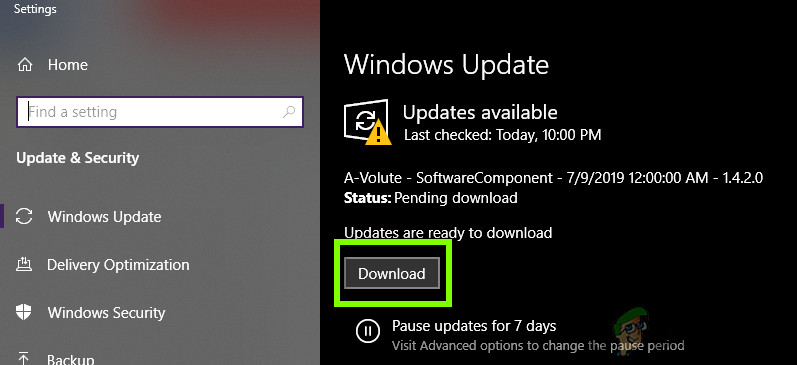
Many BSOD error messages that are encountered can be contributed to an outdated Windows Operating System. Checking Windows for updates can be a way to fix the issue of HAL Initialization Failed BSOD. Even if Windows offer an optional update, install it. If Windows Update failed to resolve the problem, please try the next solution.
Solution 9: Updating Drivers
Like mentioned earlier, this BSOD also occurs if you have bad or outdated drivers installed on your computer. Now here you have to manually check each driver yourself and make sure it is updated. Either you can use Windows update to check that for you by updating automatically or you can update the drivers manually by downloading them first from the manufacturer’s website.
Also, if a driver is having a problem during installation/updating, try using the compatibility mode to install that driver. The compatibility mode creates an environment which belongs to a previous version of Windows. Follow the steps listed below: After updating drivers or compatibility testing, check if the problem is solved.
Solution 10: Disable Antivirus
It is always a good idea to temporarily disable the Anti-Virus and Security software while troubleshooting BSOD errors. You firstly disable such software and if the problem is solved then you should replace the Anti-Virus. For complete details on how to turn off/temporarily disable the Anti-Virus, please check our article on How to disable Antivirus software. After disabling the Anti-Virus check if the problem is solved. If the issue remains and you still experience the blue screen after intervals, you can re-enable the Anti-Virus and proceed. Do note that it is okay to re-enable the Antivirus software, but we still recommend to keep it disabled during the rest of the troubleshooting process.
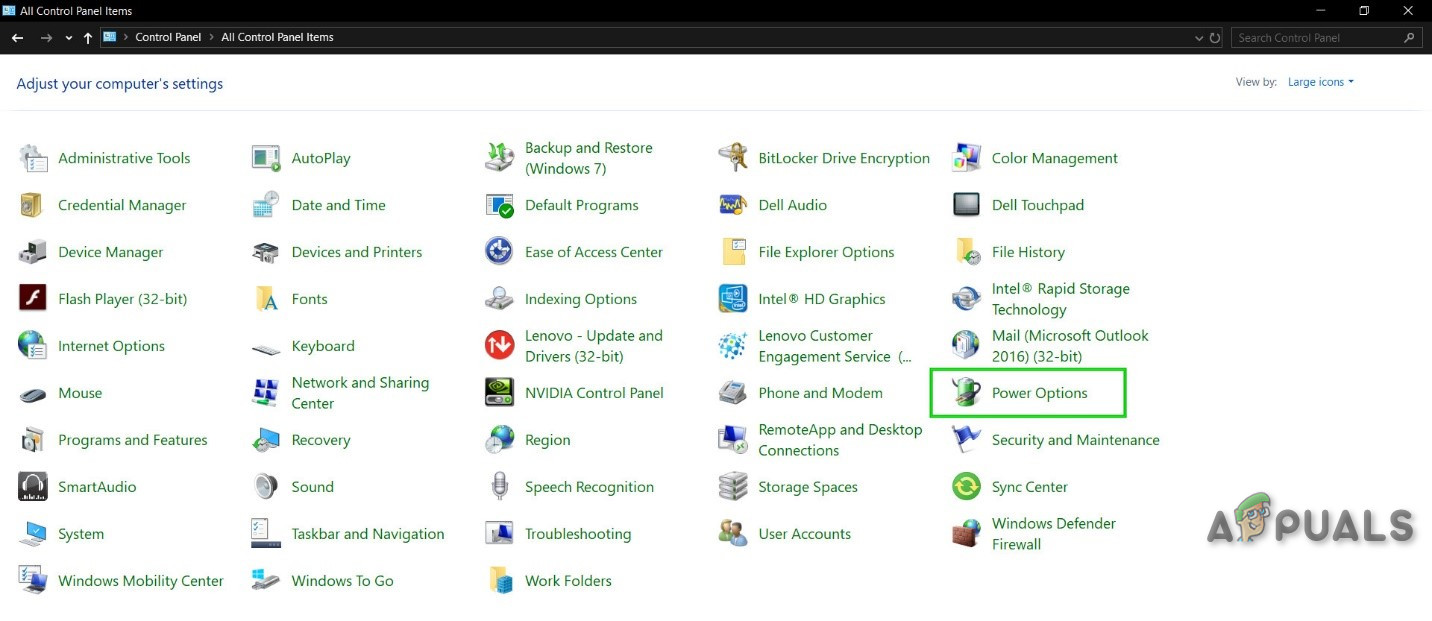
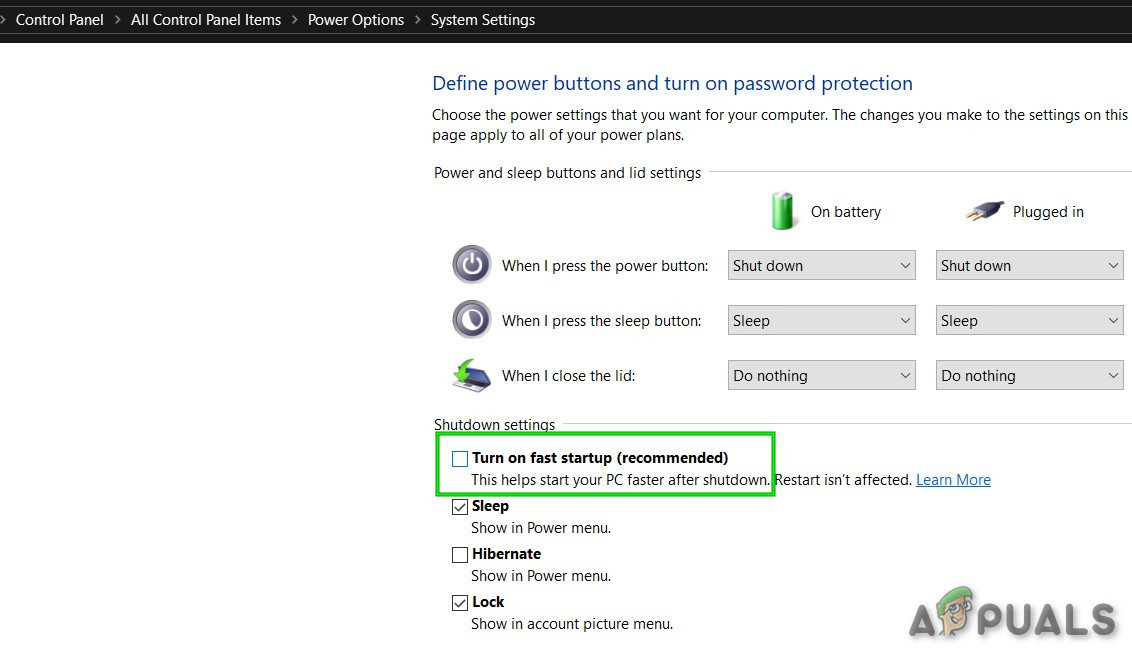
Solution 11: Turn off Fast Startup
Fast Startup is a Windows 10 feature that allows a PC to boot up rapidly, which is quite helpful for systems that are still using a mechanical hard drive. It also allows the machine to boot faster after turning it on. But this power option sometimes is known to have issues with sleep mode. Users reported that after putting their computer in sleep mode, they got HAL_INITIALIZATION_FAILED when they tried to turn on their computer again. Here are the steps on how you can disable fast startup on your computer. Restart the system and then check if the problem is solved. If it is not resolved, keep the fast startup disabled and proceed with the next solutions.
Solution 12: Uninstall Update
If the problem started to happen after a particular update, then uninstalling that particular update can solve the problem. Windows is notorious for releasing unstable updates to the computer and then releasing a fix later on. We also came across some instances where a specific update was clashing with some applications/programs in the computer causing it to crash and displaying the Blue Screen of Death. To uninstall an update on your Windows, follow our article on How to Uninstall a Windows Update. After uninstalling if you are still facing HAL Initialization Failed error, proceed to the next solution.
Solution 13: Changing Sleep Settings
In sleep mode, the system goes to a low power consuming state & the display is turned off. The system can be resumed, or the PC can be woken up by hitting any key on the keyboard or the mouse. Many times this blue screen of death is said to occur when resuming from Sleep Mode. Disabling sleep mode may solve the problem. Even though this might rip of you of the accessibility where you can expect your computer to go into sleep mode automatically, it will avoid the Blue screen of death from occurring again.
Solution 14: Performing a System Restore
If all the above methods don’t work, it is worth a shot restoring back before any latest Windows 10 updates were installed on your computer. If you don’t have a last restore point, you can install a clean version of Windows. You can use the utility “Belarc” to get all your licenses saved, backup your data using external storage and then perform a clean install. Note: Performing a system restore is only valid if this error started to come after a windows update. If this isn’t the case, you can go ahead and perform a new install of Windows after backing your data. Here is the method on how to restore Windows from the last restore point.
You can learn more about system restore to gain more knowledge about what it does and what are the processes involved. If you don’t have any restore points or if the system restore doesn’t work, you can do a clean install of Windows using bootable media. You check our article on how to create a bootable media. There are two ways: by using media creation tool by Microsoft and by using Rufus.
Solution 15: Reset Windows 10
Windows 10 allows its users to reset their systems which will return the computer’s OS to its factory settings and all the applications/drivers/services that did not come with the computer will be uninstalled. All changes made by the user to the system’s settings & preferences are nullified. As far as the user’s files and data stored on the computer are concerned, the user will be prompted to either to keep them or remove them while resetting the computer
Solution 16: Clean Installation of Windows
If still, nothing has helped you so far then it is time to move to the last resort, which is the re-installation of Windows itself. The clean installation refers to the process where you completely reset the computer by removing all the files and applications from it and installing Windows files from scratch. You can check more detailed steps in our article on How to install Windows 10. Hopefully, your HAL Initialization Failed in Windows 10 BSOD error is solved and you can use your system without any interruption.
FIX: Steps to Fix BSOD Error “KERNEL_DATA_INPAGE_ERROR"FIX: KERNEL_SECURITY_CHECK_FAILURE BSOD in Windows 10Fix: DRIVER_OVERRAN_STACK_BUFFER BSOD on Windows 10How to Fix “KERNAL_DATA_INPAGE_ERROR” BSOD on Windows?


![]()