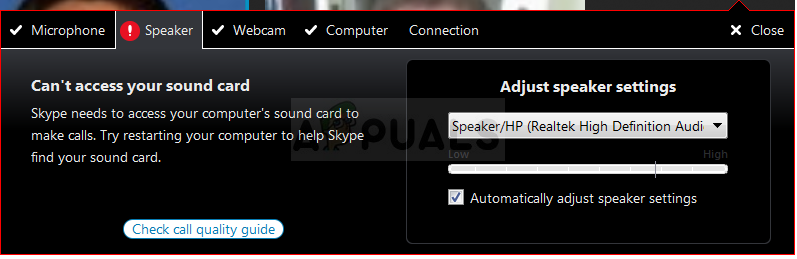
What Causes Skype to Display the Error?
This error may be cause by a recent Windows update or by upgrading your computer to a new version of Windows. It causes some permissions settings to reset themselves and Skype no longer has the permission to access the microphone. The second major cause can be found with old sound card drivers which can’t keep up with new versions of Windows or Skype. If Skype can’t access your sound card, you may be up for a challenge but it should be an easy one to overcome if you follow the steps we have prepared in this article. These methods were confirmed as working by users so make sure you check them all out.
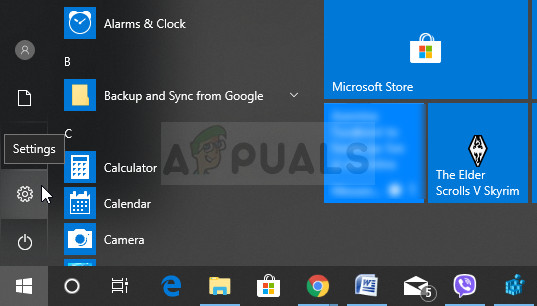
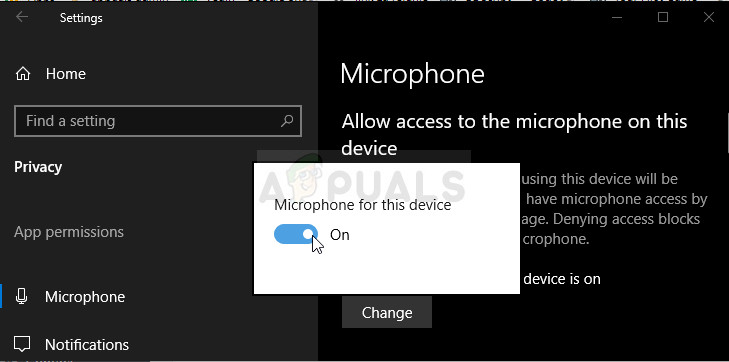
Solution 1: Let Apps Use Your Microphone
This hidden little setting might have always been turned on but it can be changes by new programs being installed or by a Windows Update which might have turned it off for various security reasons. This solution is the simplest and it can save you hours of effort so make sure you don’t skip this method when troubleshooting the “Skype can’t access sound card” problem.
Windows 10 Users:
Older Versions of Windows:
Note: Even if you are a Windows 10 user, you should still try out the second set of steps as they managed to solve the problem for some Windows 10 users when the above has failed.
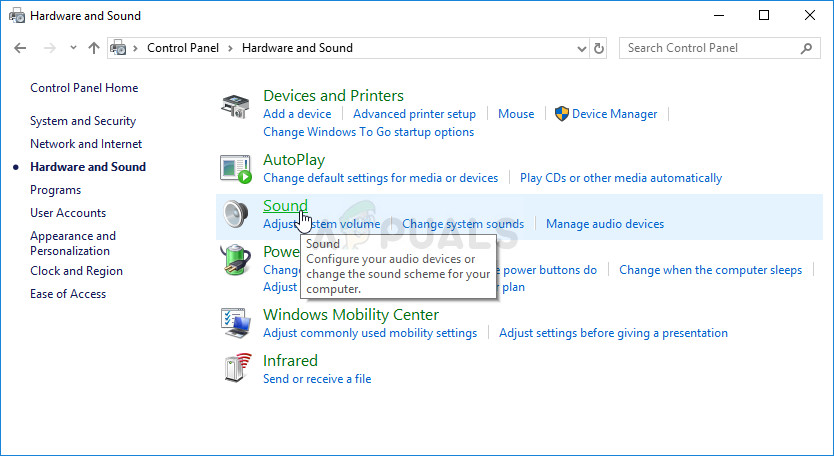
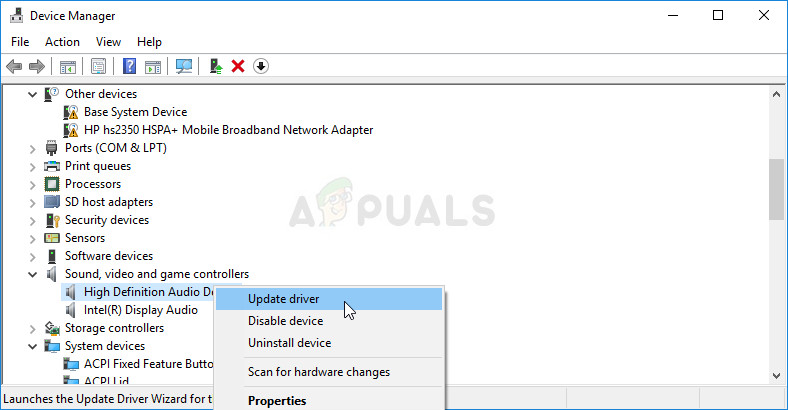
Solution 2: Update Sound Card Drivers on Your Computer
If you have recently updated things on your computer but missed out on updating your drivers, you might be risking various errors and BSODs on your computer. Old drivers are one of the root problems of almost all errors on Windows, and that includes this problem as well. Make sure you take your time and update sound card drivers.
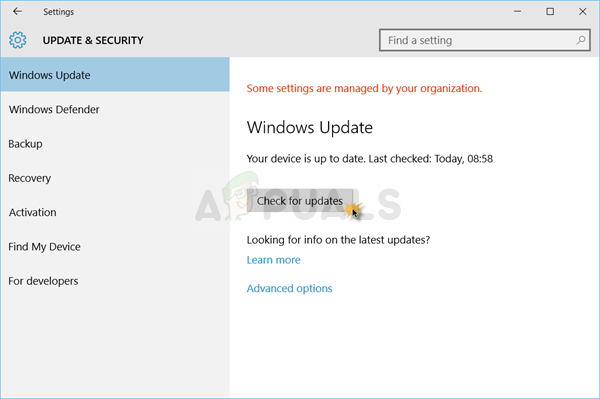
Note: If you are using Windows 10, latest drivers are often installed with Windows updates so make sure you keep your computer’s operating system fresh. Windows Update is run automatically on Windows 10 but you can check if there are new updates by following the instructions we have below.
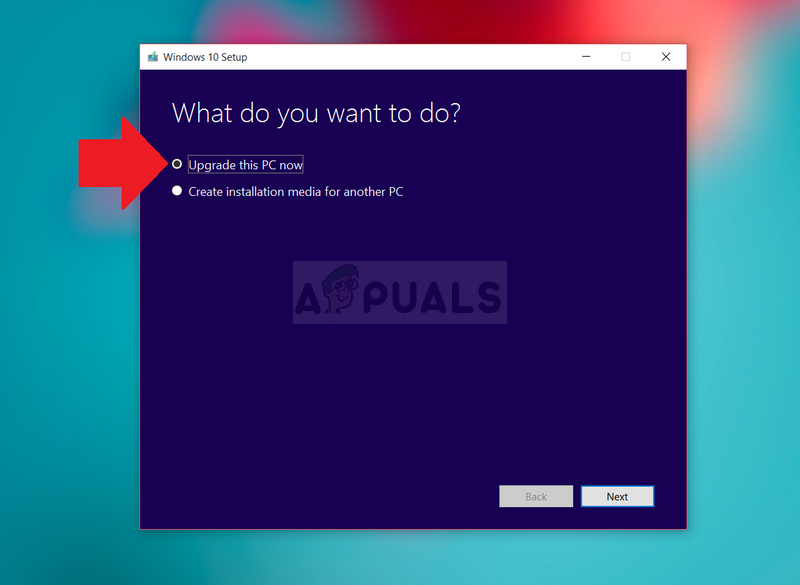
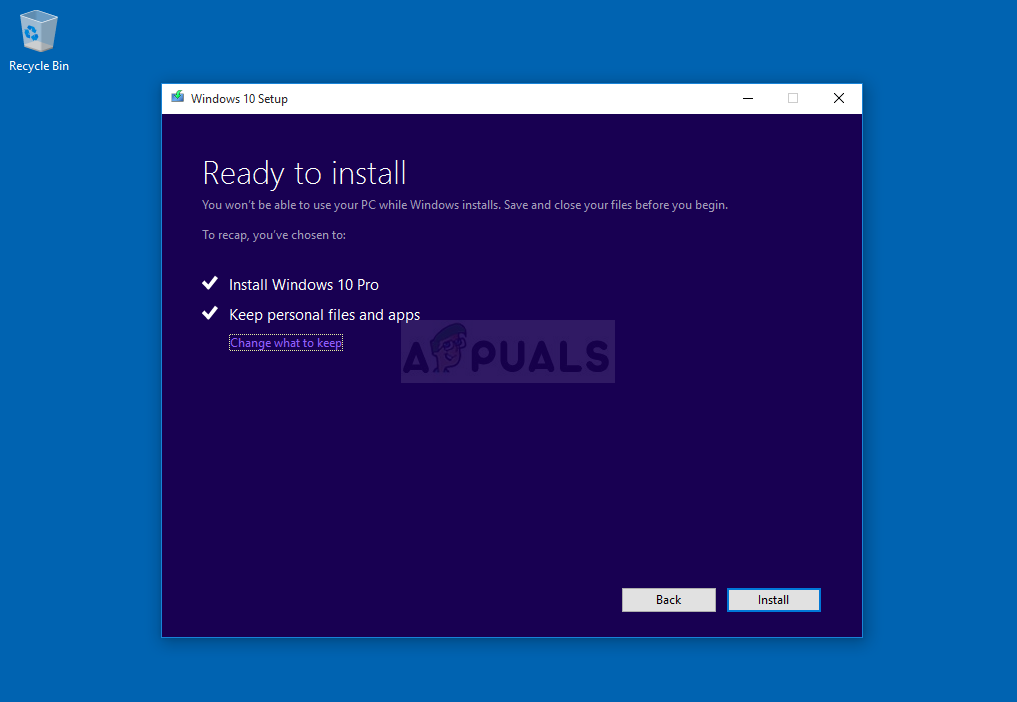
Solution 3: Perform an In-place Upgrade
This is a popular name for the method where you update or refresh your computer using the Windows 10 Media Creation tool instead of the regular way via the automatic update feature. It’s very useful and it’s the methods Microsoft officials used to solve the problem on users computers. Check it out below!
Solution 4: Perform a Clean Install of Skype
If the methods above have failed you, you should definitely consider performing a clean install which will reset the app from scratch yet you will be up within a couple of minutes. Clean install differs from a regular reinstall because it will remove all leftover files and registry entries which you wouldn’t get normally and the error might still appear without you knowing what caused it. Good luck! A good idea would be to save your chat history if you wish to have access to previous messages you have sent via Skype. You can do so by following these steps:
Now it’s time to actually uninstall the program from your computer which can be done using the steps below. If you have installed Skype using the Windows Store, it’s advisable you follow the instructions regarding the Settings app on Windows 10.
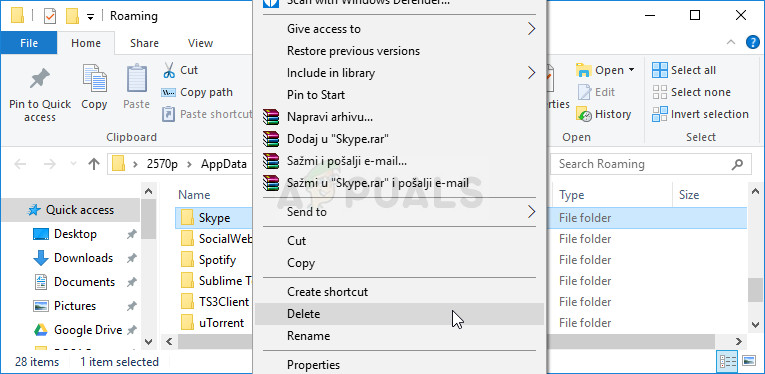
Now it’s time to remove any leftover files and registry entries which may have been left behind by the program. This is how you make sure you that no old files make it into the new installation and you will avoid old files from making the same errors on Skype.
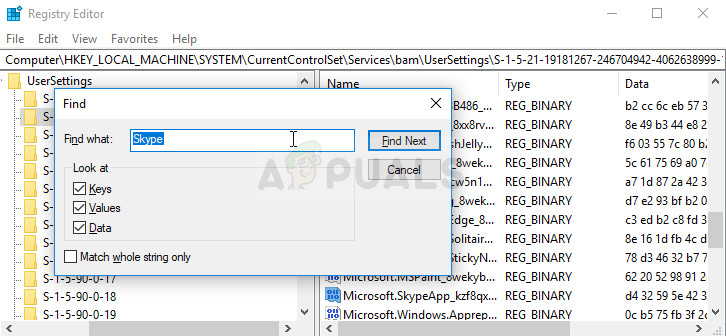
Now we will delete the remaining registry entries related to Skype. Deleting registry keys is dangerous if you don’t know what you are doing. Nothing bad will happen if you follow the instructions carefully though. Since you are going to delete several registry keys, we recommend you check out this article we have made for you to safely backup your registry to prevent other issues on your computer. Still, nothing wrong will occur if you follow the steps below.
Note: If you struggle with permissions issues while deleting one of the keys, you may need to add yourself sufficient permissions to do by following the easy set of steps below:
After performing the steps above, you can reinstall Skype by downloading it from their official downloads site, running the file you downloaded, and following the instructions on screen in order to install Skype again. Check to see if the problem still appears.
Note: If you were using the app from the Store on Windows 10, click the Store icon from the taskbar or search for it, and type Skype in the search bar. Click the Download button and wait for the app to install.
Fix: Can’t Create a Lock File at Library/Application Support/Skype/Skype.pidSkype for Mac Update Breaks Skype Directory Service, Here’s How You Can Fix ItHow to Fix Skype Share System Sound not Working on Windows?Fix: Can’t Sign in to Skype for Business