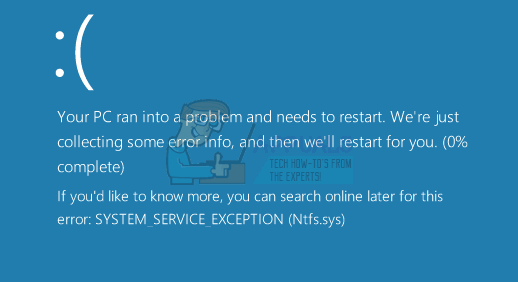
The SYSTEM_SERVICE_EXCEPTION (ntfs.sys) can appear due to a number of reasons, because ntfs.sys isn’t directly connected to anything. However, most common causes for this problem include specific antivirus and security software, corrupt or outdated drivers, or bad or incorrectly setup RAM sticks.
Whichever of these is the cause for your problem, there is an easy fix, so read on to see how you can solve this problem.
Method 1: If using Windows 10, remove BitDefender and/or Webroot
Antivirus software can be the cause for Windows problems more times than you can imagine. For Windows 10, specifically, software such as BitDefender and Webroot can cause anything from small problems, to Blue Screens of Death. If you’re facing this issue and you find that you are using any of them, a solution with a very high chance to work would be to uninstall them and revert to Microsoft’s Windows Defender, which comes built into Windows 10. You can do this easily with Windows’ built in tools. Press Start on your keyboard and type Change or Remove Programs. Click on the result, and you should see a list of all the software that you currently have installed on your system. Find BitDefender or Webroot, or both, depending on which one you have installed, and click on the Uninstall button. Follow the wizard to remove the software from your computer. When you’re done, you can restart your system to make sure that all files have been deleted. Once you have done this, press Start again and type Windows Defender. Open the app and if it isn’t turned on (it turns off when you have another antivirus application installed), press Turn On. This is done to ensure that your computer isn’t left unprotected against malware. Close the window and you should be good to go, without any more BSODs.
Method 2: Check and update your drivers
Corrupt or outdated drivers are also the cause for a number of issues, such as this one. What you should do first is to check if any driver is malfunctioning, and then update all the drivers.
Step 1: Check for malfunctioning drivers
To do this, open Device Manager, by pressing the Windows key on your keyboard, typing Device Manager, and selecting the result. You will be presented with all the drivers on your system. Expand all menus one by one, and see if there is a yellow exclamation mark next to any of the drivers. If there is, you can right-click it, and choose Properties, to see what the problem is and search online on how to solve it. The solutions are different for different problems and different drivers. However, one universal solution would be to uninstall a malfunctioning driver by right-clicking it, and selecting Uninstall, and then opening Windows Update from the Start menu, so it can find and install the missing driver.
Step 2: Update all drivers
This can be done through Windows Update, which you can open by pressing the Windows key on your keyboard, typing Windows Update and opening the result. Click Check for updates and let Windows do its thing. If a driver isn’t updated, or it’s missing, it will find it and give you the option to update it. Do that, and when Windows Update is done, reboot your system to make sure everything is settled. This can solve the BSOD if it was a driver issue, and you will have a fully functional system.
Method 3: Check your RAM
Malfunctioning or incorrectly setup RAM can lead to anything from BSODs to systems being completely unable to boot. You should first check the hardware, see if all sticks are functioning properly, and if everything is okay, check the timings and frequencies, as certain motherboards and processors, especially from AMD, can be very tricky with this. The hardware check is very easy. First of all, turn off your computer. You could also unplug it from the power source as a safety precaution. Open the lid, and locate the RAM sticks. What you should do is remove all of them, and try to power on the computer with every stick, one by one. If one of them is faulty, your system won’t turn on and you will know that you should replace it with a new one. If everything is okay with the hardware, you should check the timings and frequency of the RAM. Since you’ve already taken a look at the RAM, you should know the manufacturer and model, and you can go to its website to see the defaults and recommended values. You can check what those values are on your system with a software such as Speccy or CPU-Z. If they don’t match, and you haven’t changed them by yourself by overclocking or underclocking the RAM, you should enter the BIOS and take care of that. This is done when you turn on your computer, before Windows boots, by pressing either Esc, F2, F12, DEL or Backspace, depending on your particular motherboard. When inside the BIOS, you can use the arrow keys and function keys to navigate. Each BIOS is different, so you should find the RAM settings and adjust them to the manufacturer’s recommendation. When you’ve done this, save the changes and exit. Your system should now be working properly. While this error can give you a lot of headache, the cause is almost always one of the aforementioned ones. Follow our guides to solve them and your system will be back to full functionality in absolutely no time.
Fix: SYSTEM_SERVICE_EXCEPTION (igdkmd64.sys)FIX: SYSTEM_SERVICE_EXCEPTION (asmtxhci.sys)FIX: SYSTEM_SERVICE_EXCEPTION (rtkvhd64.sys)FIX: SYSTEM_SERVICE_EXCEPTION (dxgkrnl.sys)
