Simply make the current user the owner of the resource in question and grant them elevated permissions. Of course, before changing ownership you have to be logged in as, or be having Administrator privileges. If not, UAC will prompt you to acquire Administrator privileges before proceeding. Standard users may be prompted to key in the Administrator password as well (the only difference is the ownership will be granted to the specified account with administrative privileges and NOT the standard user account). Otherwise, as an Administrator all you need to do is click “yes” and you’re good to go. However take note that application files such as CMD files, EXE files, etc. will not have “take ownership” in their context menus. Instead, they will continue to have the “run as Administrator” option. Before proceeding with taking ownership there are a few things you have to take into account. The below procedure works for Windows 10 systems whose language is set to English.
How to Add the Take Ownership Option in the Context Menu
Through Registry Files:
Download this file. This is a compressed file, and you will need to decompress or extract it using WinRar or WinZIP. After you’ve extracted the files, there will be two registry files in the folder. Run the one that says to Install, and if you wish to uninstall it, then run the one with the words uninstall in it. When you run it, agree to the UAC prompt by clicking Yes, and then choose YES again when the registry editor wants you to confirm the addition. Once done, reboot the PC. After the reboot, “Take Ownership” option will be added in both folder and file context menus. Once you right-click any folder or file, you immediately become the owner of that computer resource. You will be at liberty to carry out any changes you wish to on the specified file, folder, or drive.
More advanced computer users can manually take ownership of a drive, file, or folder. This is done through coding in the command prompt. The procedure varies slightly for files and folders. The steps are: Run command prompt as administrator. Hold the Windows Key and Press X. Choose command prompt (admin) Key in the following command This will take ownership of a file and assign full permission to it. For a folder, the code is icacls filename /grant administrators:F
Manually through Registry:
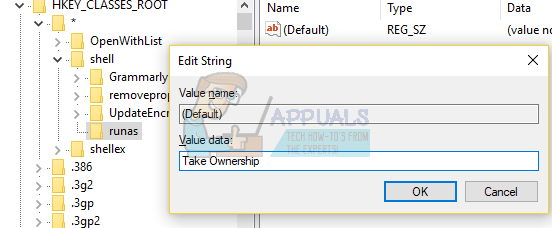
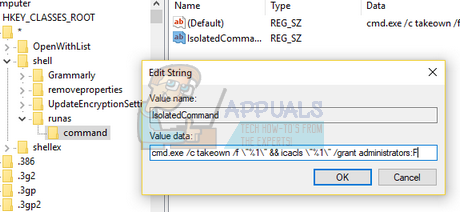
We need to make some changes to your computer’s registry. This process can be considered a long and tedious task but, you only have to go through it once and life will be easy. Do note that Registry Editor is a very powerful tool in Windows and you should be very careful when making changes to it. Backup your registry or create a restore point of your Windows if you have important data on the PC. icacls foldername /grant administrators:F /t We are going to make changes in two locations in the registry. The first location will add the “Take Ownership” to the context menu for files of any type while the second location will add the option to the context menu of any folder.
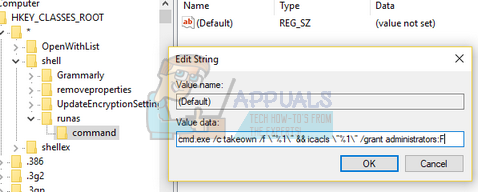
This will add the “Take ownership” command to the context menu for files.
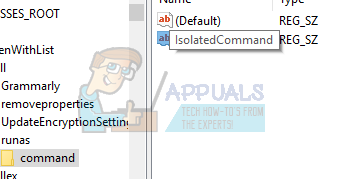
Now we will add the context menu option to folders. We are going to make essentially the same changes we did earlier but to a different directory.
This will add the “Take ownership” command to the context menu for folders.
How to Take Ownership Of Registry Keys in WindowsWhat is Takeown and How to Use it to take Ownership of Files and FoldersHow to Add Restart Explorer Context menu in Windows 11How to Add or Remove the Manage Item on the File Explorer Context Menu?