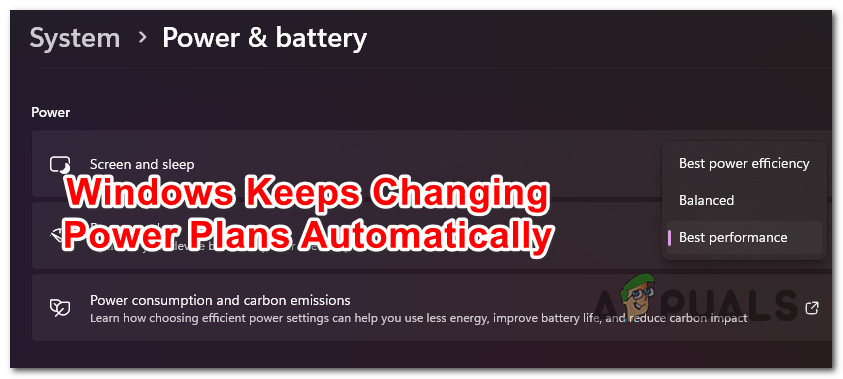
While some users are annoyed that they want to go for the Balanced power plan and Windows keeps changing it to Ultra Performance, others experience the issue in reverse (Windows keeps defaulting to Balanced). Let’s start troubleshooting.
1. Restore default settings for the power plan
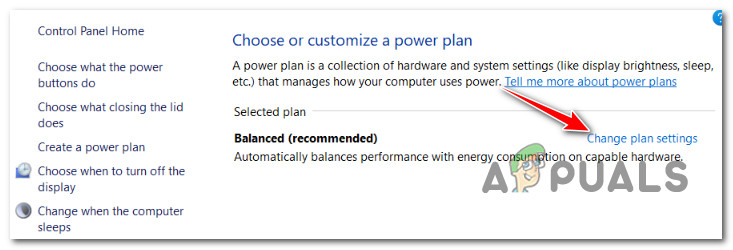
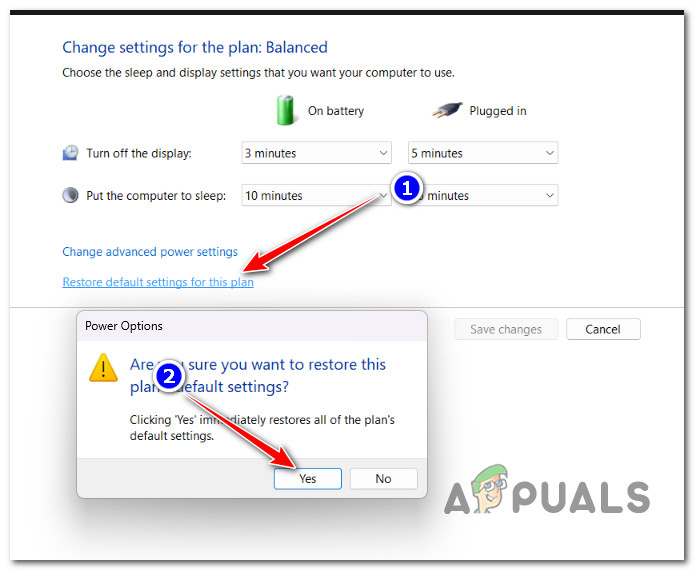
The ideal way to troubleshoot this issue is to revert every power-plan-related setting to the default values. This is usually effective in situations where you previously modified your AdvancedPower Plan settings or if you let a battery-optimized tool do it for you. In most documented cases, this intentional change between power plans happens due to a previously established advanced power-setting rule. To fix this issue, access your Power Plan settings and restore the settings to the default. If there’s nothing wrong with your battery, this action should allow your OS to remain consistent with the plan you establish. Here’s what you need to do: If the issue is still not fixed despite resetting the power plan options, move down to the next method below.
2. Run the Power troubleshooter
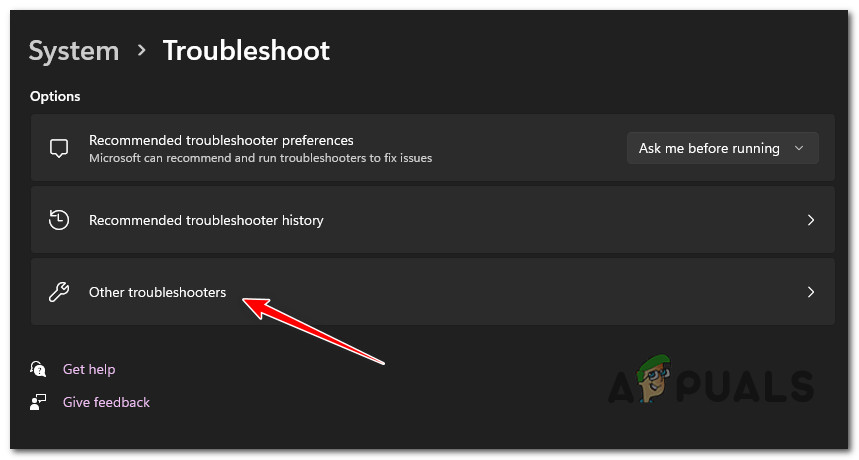
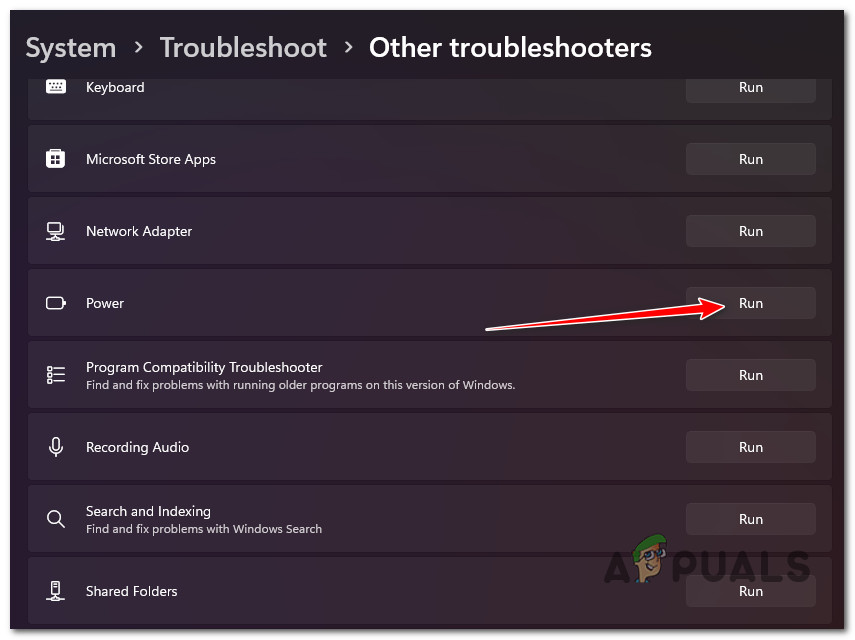
If resetting back to the default power plan didn’t make a difference for you, the next thing you should do is troubleshoot for a potential power-related glitch. By running the Windows Power Troubleshooter, you will force your OS to cross-check your current power components against a list of automated repair strategies. If any recognizable scenario is found, the Windows Power Troubleshooter will automatically attempt to fix the issue. IMPORTANT: Before you run the Power Troubleshooter, start by unplugging any unnecessary device from your computer, including USB-connected printers, headphones, external cameras, and anything else that can suck power from the PSU. After doing this, perform the steps listed below to launch the Power Troubleshooter and see if it manages to fix the issue for you:
3. Uninstall Asus AI Suite 3 or Intel (R) RMT (if applicable)
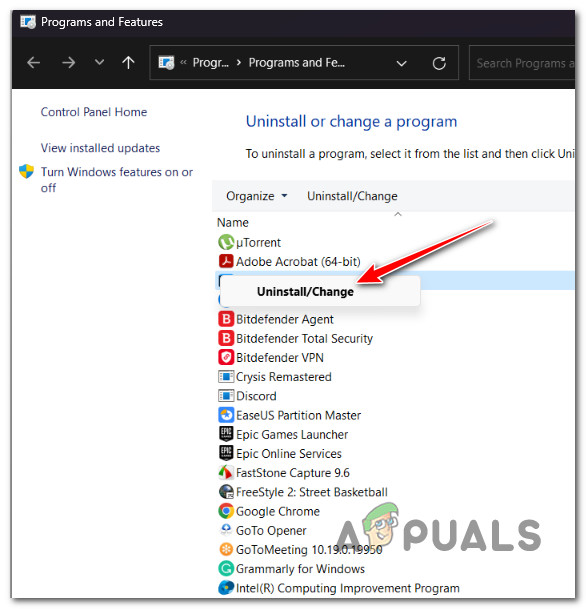
If you set a power plan that only remains saved until the next restart and you’re using an ASUS computer, you should check if ASUS AI Suite 3 is installed on your PC. Note: One particular build (Asus AI Suite 3 v3.00.10) is known to override any user-established power plan. Since then, ASUS has patched the issue, so newer builds won’t cause the same behavior on Windows 10 and 11. However, according to other ASUS users, the self-updating function is very unreliable – your best course of action is to uninstall ASUS AI Suite 3 and reinstall it by downloading the latest build (if you use it). If you don’t actively use Asus AI Suite 3, there’s no point in keeping this tool installed since it’s no way necessary to your Windows installation. Intel Ready Mode Technology is a similar tool that might cause this issue. Some users who had this tool installed have reported that it was constantly altering their power scheme, even if it was disabled or not actively running in the background. If you have this installed, the fix is the same – uninstall the tool from your system. Follow the instructions below to uninstall Asus AI Suite 3 v3.00.10 or Intel Ready Mode Technology if this scenario is applicable: If the same problem is still occurring, move to the next method below.
4. Delete unused power plans (Windows 11 Only)
If you’re using Windows 11, chances are you’re dealing with the same glitch that has affected many users (using retail and insider builds). Certain OEMs had this weird issue where the Ultimate Performance plan always defaults to High Performance. This is a huge problem for gamers since they lose precious FPS. Fortunately, there is a fix, but you won’t like it much if you frequently change between power plans. The solution confirmed by most affected users is to delete every other power plan besides Ultimate Performance. This will ensure that your OS doesn’t have an inferior power plan to default on. Here’s how to do this: If the same problem is still occurring, move to the next method below.
5. Uninstall Avast (if applicable)
If you’re using Avast as the default security suite, you should know that it has a performance feature buried in its UI that will change the default power plan without your permission. It turns out that the “Do Not Disturb” feature of Avast will automatically run the application that you are actively opening with priority and override your power plan to ‘High Performance” without asking you anything. To mitigate this issue, you can either disable the Do Not Disturb mode or you can simply uninstall the antivirus. If you plan on going for the uninstallation, make sure you also remove every remnant file by following this guide. If this scenario is not applicable to you, try the next method below.
6. Modify the Behavior of IRMT Service (if applicable)
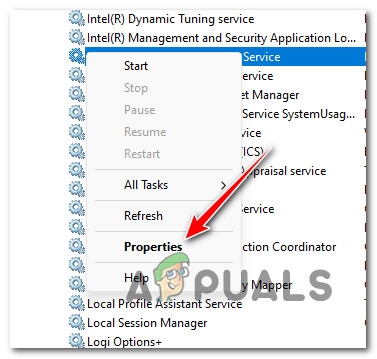
If you have the Intel Ready Mode Technology app installed and you’re actively using it, the only way to prevent this app from overriding your active power plan is to re-configure the main IRMTService. IMPORTANT: If you’re using a newer Dell with the newer version of BIOS, you can also disable the Intel Ready More Technology without uninstalling the main app at the BIOS level. If this option is not available for you, open the Services screen and look for the IRMT Service (Intel Ready Mode Technology). Once you find it, ensure the behavior is set to Manual, so this service is never permitted to start on boot up. Here’s how to carry on this method: If the problem is still not fixed, try the next method below.
7. Perform a clean boot
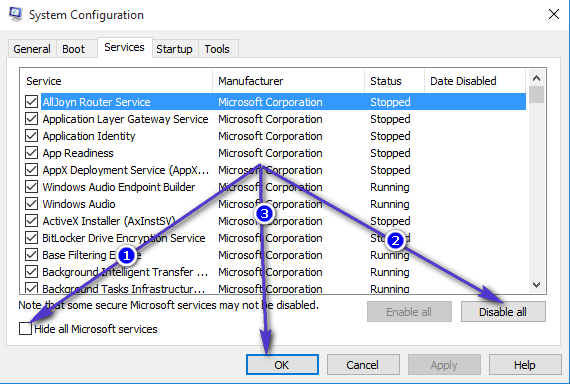
If none of the methods above have allowed you to prevent your OS from changing the power plan without your specific consent, the next thing you should investigate is a third-party culprit. This is the logical follow-up method if uninstalling ASUS AI Suite and/or Intel Ready Made Technology didn’t work for you (or was not applicable). Achieving a clean boot state will force your Windows installation to boot up without any non-MS services and processes. This will help you rule out a potential 3rd party cause off your list. After achieving a clean boot state, utilize your PC normally and see if the power plan changes again. If you confirm that the problem is not occurring while in clean boot mode, you should systematically re-enable each 3rd party component until you discover the culprit changing the power plan. Start with the usual suspects like computer performance tools, then look into manufacturer-provided support tools. If getting to a clean boot state doesn’t solve the problem, move on to the next method below.
8. Establish Custom Power-plan via Local Group Policy
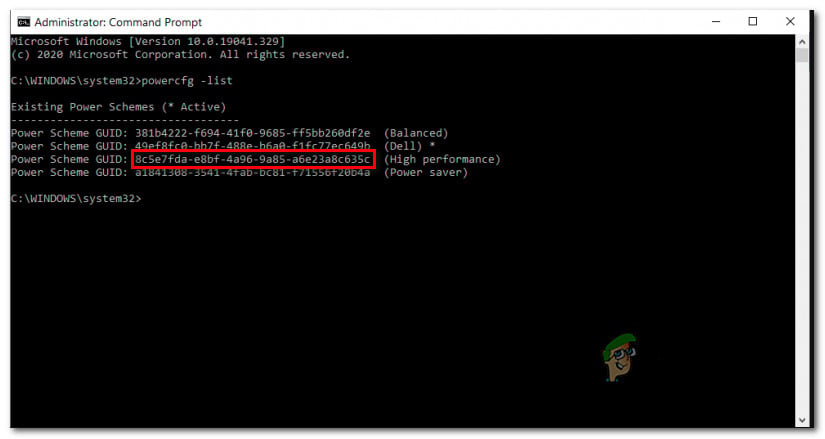
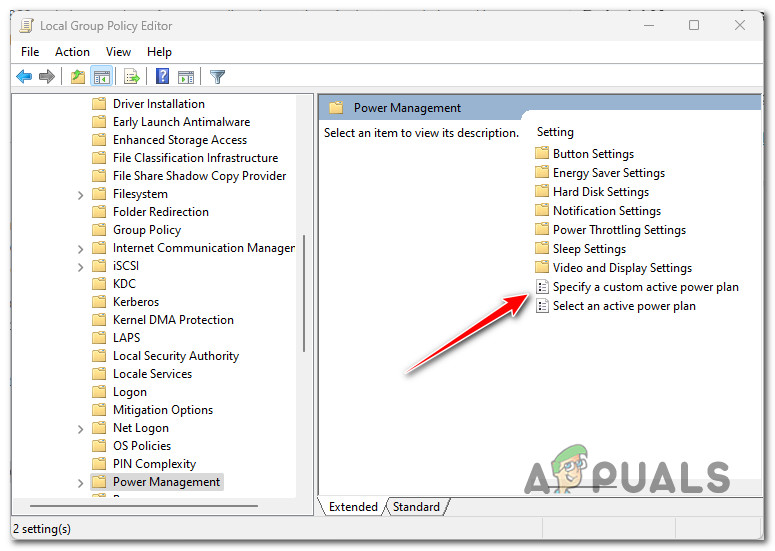
If none of the methods above ended up working for you, another thing that you should try is assigning a custom power plan via Local Group Policy Editor. But to do that, you will first need to open up an administrative Command Prompt terminal and generate a list of all the compatible power schemes. Once you are armed with the list of power schemes your computer supports, you can use the Local Group Policy Editor (GPEDIT) to establish a custom active power plan. Note: This custom plan enforced via Local Group Policy Editor will remain active even if another OS component or 3rd party suite attempts to change it. However, if your battery is damaged, your OS might still forcibly change it to Balanced or Battery saving (as a security mechanism) to preserve the battery. More details on the next method are below. If you want to give this method a try, follow the instructions below: IMPORTANT: Home and Education editions of Windows won’t include the Local Group Policy Editor by default. If you’re using a Home or Education Windows edition, follow this guide to install the Gpedit utility manually first. If this method didn’t allow you to fix the issue, move down to the next method below.
9. Analyze the health of your battery (if applicable)
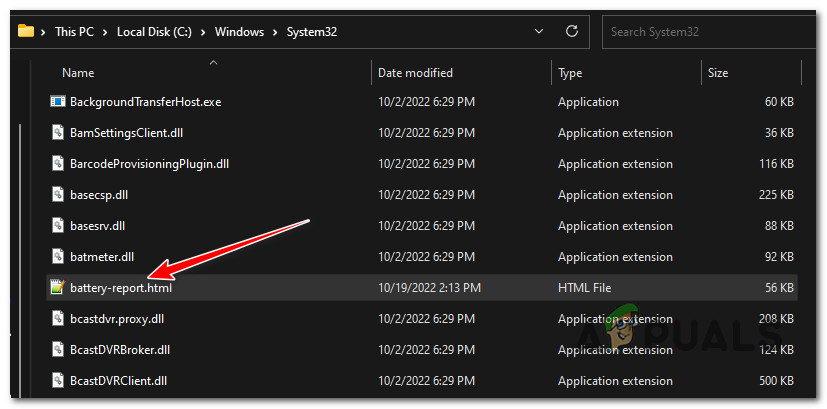
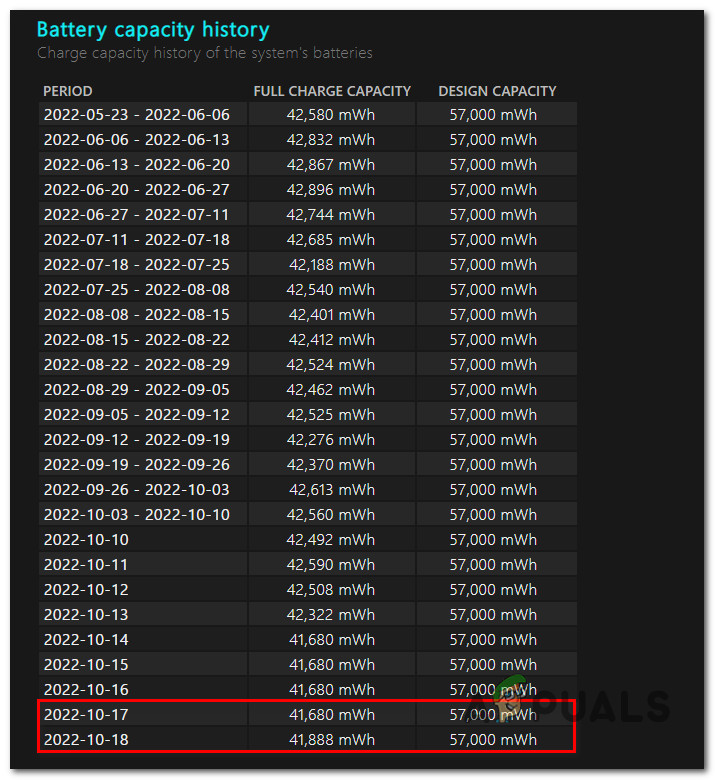
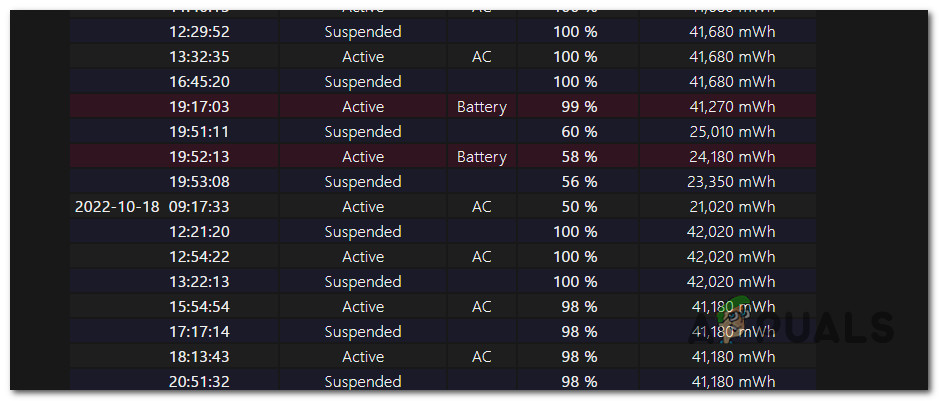
One of the most common reasons you might experience sudden power plan changes is if your battery has a sudden drop in the battery-life percentage. This typically happens with laptop batteries that are older than 2 years. Note: If you don’t experience this issue on a laptop, tablet (or a Windows device with a battery), skip this method and move down to the next method below. Windows is hard-wired to switch back to Balanced or Power-Saving as a security mechanism (to extend the battery life). If you only face this issue while your laptop is NOT plugged into a power source and your battery is over 2 years old, you should take the time to investigate the health of your battery by running an elevated CMD command. Once the battery report is generated, you can go through it and see if any student percentage drops are forcing your OS to override the user-selected power plan. Follow the instructions below to generate a battery report and inspect it:
How to Restore Missing Power Plan Options on Windows 10How to Setup a Custom Power Plan on Windows 10FIX: Default Printer Keeps Changing on Windows 10How to Fix Roku Low Power or Insufficient Power?
